
Today is all about making leaves with Lutradur.

If you follow my blog at all you know I like to make leaves. Here are several posts with different leaf making techniques: Leaf Printing, Gel plate and leaf printing, Leaf foam stamp, and Hammered leaves.
Here is one more technique for making leaves. I’m using Lutradur. I’ve known about this mixed media material for years, but have never tried it. I tried using Pellon 830 for this technique. It did not work, and was hard to sew. I almost gave up on doing this, but decided to order some Lutradur. What a difference. Let’s get started.
First, paint the Lutradur. I used Marabu Fashion Spray paints, but you can use any paint. Set it aside to dry.
As with my other fabric leaves, I start with a real leaf (This one I had preserved from last year). For information on preserving leaves (I have lots of them from years ago that still work!), check out this post. However, instead of printing directly on the medium, I am printing on cardstock.
Here is my set up. I’m using Artistic Artifacts Fluid Textile Paint just because it was close at hand. Normally on paper I’d use just a regular acrylic paint.

Dab paint on the vein side of the leaf.

Place paint side of leaf on cardstock, and cover with a piece of paper. Roll over paper using a brayer.

Lift up the paper, and you have your printed leaf. The image doesn’t have to be perfect since you will just be tracing the main parts of the leaf.

I decided to print a couple other leaves.

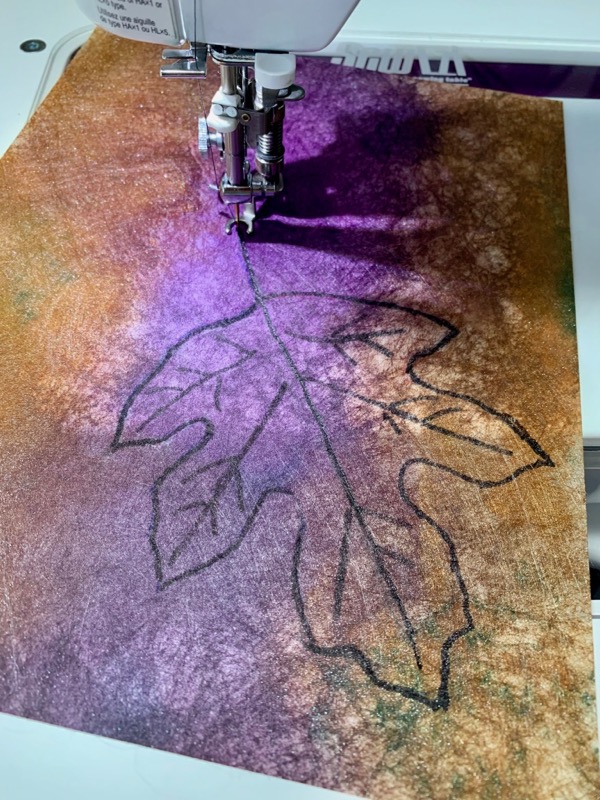
Once the Lutradur is dry, it’s time to trace the leaf onto this medium. Because my paint was dark I used a Sharpie. I tried several other pens and I couldn’t see the design. I also used a light board.

Once traced it’s time to head to the machine. I sewed on my lines, and even added more. With the sharpie you will still see the lines, so I used a black thread.
Once finished, cut out the leaves close to the stitching. Because Lutradur is cross between paper and cloth, I used my paper scissors.
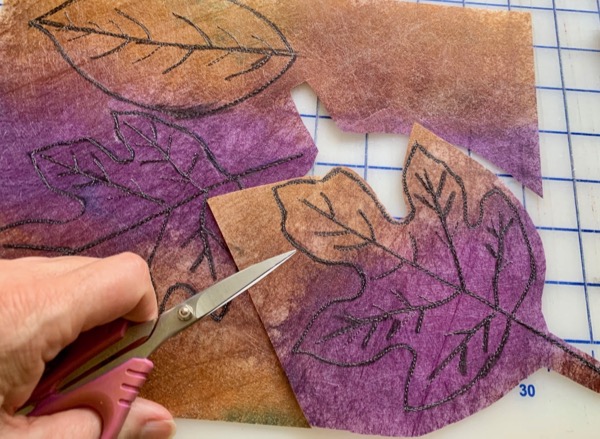
Here they are all cut out.

But WAIT! We aren’t done. Let’s go to a well ventilated area, and do some burning! I’m in the garage now with the door open. The leaf is placed on a metal tray. Using the heat gun I burn the leaf so it resembles a decaying leaf. The heat also helps to curl it.

Be careful at this stage because it doesn’t take much to burn up the leaf. The above photo is a bit misleading. Don’t let the heat gun get real close to the leaf. Burn until you are happy with it.
Now you have created some leaves for your project.
These are fun to make. I found that I didn’t have to add every vein to the leaf to make it look real. That made the process go much faster at the sewing machine. I’ve decided that I’ll print my other leaves on cardstock too, so I’ll have a variety. I’ll definitely be making more since I have 8 more sheets of Lutradur!
Thanks for dropping by. Have a great rest of the week. For additional inspiration, check out the link party at Off The Wall Friday.
Discover more from Lynda Heines Fabric Design
Subscribe to get the latest posts sent to your email.
These are great, Lynda! I did this technique a few years back, and have a project coming up where I will give this a try again. I love the curl that you get with the heat gun… makes it look so realistic! Thanks for the refresher!
Judy, It’s an old technique that I’ve always wanted to try but just never got around to it. Sure glad I decided to try it. Can’t wait to see how you use them.
Looks like this is fun. I will have to remeber these for some of the fall projets.
Great tutorial. Have to get me some Lutrador. I have a heat gun that I use for embossing. Would that me strong enough?
Hi Norma, Thanks. Yes, I use a heat gun. Have fun!
These are wonderful! Thanks for showing how you made them.
Terry, Thank you! Thanks for stopping by.
Très intéressant cet article. Je vais essayer la technique. Merci pour ce partage. Belle journée.
Thank you for stopping by and commenting. Sure hope you try this technique.
What a unique project. Thank you for posting. I have a question… can you show e some ideas how to incorporate these finished leaves in a few projects? I can run creatively with a technique once I see some ideas. I quilt, so am interested in an art quilt idea. Thank you.
Shirley, I’ve not used these in a project yet. They can be used just like any applique. However, I used leaves I printed on fabric in my Recycled Jeans Book. I could have used these instead, but I wanted to use the fabric ones. Here is the video of the Jeans book and how I used leaves in it: https://youtu.be/r5_iEenBWtA?si=f32QxpQOd_EOCktc